


How to Know What Size & Style Heater to Use in Your Sauna
Choosing the correct heater for a sauna is one of the most critical decisions to make. The heater is essentially the “engine” of the sauna. If it’s too small, you’ll struggle to heat the space; too large, and you may waste energy, get unstable or uncomfortable heat, or even shorten the heater’s lifespan. Below we’ll cover: how to size properly, what’s “ideal”, consequences of undersizing or oversizing, and style/type considerations.
1. Understand the Space: Volume & Construction
a) Measure the sauna room
Start with the internal volume of your sauna in cubic metres (m³) or cubic feet.
- Measure length × width × height of the interior. For example a 2 m ×1.8 m ×2.1 m room = ~7.6 m³.
- If you prefer feet: length (ft) × width (ft) × height (ft) gives the volume in cubic feet, which can then be converted.
b) Consider construction, materials & location
- Are the walls well-insulated wood? Do you have large glass areas or many windows or a glass door? These increase heat loss.
- Is the sauna indoor or external/outdoor? Outdoor saunas or those with poor insulation will require extra heater capacity.
- Ceiling height: Higher ceilings = larger volume to heat, more potential for stratification of hot air.
- Cold “surfaces” like raw concrete, stone, large glass panels act as heat sinks and demand more heater power.
2. Rule of Thumb Sizing Guidelines
These help you define a baseline before fine-tuning.
- Many manufacturers / industry sources suggest about 1 kW of heater power per cubic metre of well-insulated sauna. For example: a 7 m³ sauna → approx 7 kW heater.
- Another version (in cubic feet) puts it at roughly 1 kW per 45-50 cubic feet of space.
- For example from one chart:
- 100-150 cu ft → ~3 kW
- 151-210 cu ft → ~4.5 kW
- 211-310 cu ft → ~6 kW, etc.
- Online calculators (for example from Harvia) incorporate factors like glass area, log walls, cold surfaces, etc. Harvia - Healing with Heat
These rules give you the ball-park range. Then you refine based on materials, insulation, usage patterns.
3. What’s “Too Small”, “Ideal”, “Too Big”?
Too Small
- If the heater is undersized, expect:
- Long warm-up times (perhaps 40-60+ minutes or more)
- The heater may run continuously but struggle to reach desired temperatures.
- Uneven heat; cooler spots or bench level not warming fully.
- The sensation that the heater is “working hard” but you still don’t get optimum heat.
- Consequences: user frustration, higher running costs, possible accelerated wear.
Ideal
- The heater warms the space in a reasonable time (30-45 minutes for many residential saunas) to the target temperature (for example ~80-90°C for many traditional saunas).
- Maintains the temperature with modest cycling, good bench level heat, solid steam/“löyly” from the stones.
- Balanced running cost, good performance and comfort.
Too Big
- If the heater is significantly oversized:
- You’ll heat the space very quickly, which may sound good, but you risk overshooting desired temp, or the space becoming uncomfortably hot (especially at bench level).
- The heater may cycle on/off frequently (“short-cycling”) which can reduce efficiency and potentially reduce lifespan of components.
- Energy waste: you’re using a larger capacity than necessary for your space.
- From a cost/installation standpoint you paid for more heater capacity (and possibly upgraded wiring) that you don’t need.
- However, a slightly oversized heater (10-15% above baseline) may be justified in certain conditions (e.g., outdoor sauna, large glass, poor insulation) as a buffer.
4. Style / Type of Heater & How That Affects Sizing
Electric heaters
- Most common in home and light commercial saunas. Precise control, clean installation.
- Their power rating in kW is the key sizing parameter.
- You’ll also want stone capacity (for steam generation) and proper installation (clearances, wiring, control panel) for optimum performance.
Wood-burning heaters
- Rated differently (firebox size, BTU, or kW equivalent) but the principle is the same: match heater capacity to sauna volume + insulation + expected heat loss.
- Because they have slower ramp-up, outdoor exposure and ventilation become even more critical.
- Usually for more rustic, larger or remote saunas.
Infrared heaters
- These work on a different principle (radiant heat, “body heating” rather than purely air heating). Sizing logic changes and often you’re concerned with panel coverage rather than kW per m³ of space.
- In traditional saunas (wood-heated/stone-heated) the kW-volume relationship is more straightforward.
Combination / “combi” heaters (steam + dry)
- If you’re using a heater that has combined functions (steam, higher humidity) you may need to factor additional heat load (steam generation uses extra energy).
5. Detailed Step-by-Step Sizing Methodology
Here’s a practical walk-through you can follow (and share with customers):
- Measure interior length, width, height → calculate volume (in m³ or ft³).
- Assess the sauna’s build:
- Wall/ceiling insulation: standard vs premium vs minimal.
- Door and window area: how much glass? Large frames?
- Indoor vs outdoor location: ambient temperature extremes? Wind exposure?
- Ceiling height variation (high ceilings require more power).
- Use baseline rule: e.g., ~1 kW per m³ (or ~1 kW per ~45-50 ft³) as starting point.
- Adjust upward for increased heat-loss or challenging conditions:
- Large glass area or many windows → add ~1 kW (or more depending on size)
- Outdoor sauna or very cold climate → add ~10-20% or choose next heater size up.
- High ceiling (e.g., >2.3 m) → adjust upward.
- Many cold surfaces (stone, concrete, full log walls) → adjust upward. Harvia - Healing with Heat
- Choose heater size accordingly (kW rating).
- Check manufacturer’s recommendations: many heater brands publish size charts and calculators for their models. For example Harvia’s calculator asks for width, height, depth, and calculates required heater size. Harvia - Healing with Heat+1
- Consider installation factors:
- Wiring and power supply must match heater rating.
- Clearances, ventilation, stone capacity.
- Control panel and thermostat placement matter (to get correct temperature control).
- After installation, monitor performance: warm-up time, max temperature achieved, bench-level heat, feel, steam quality. If it’s too slow or not reaching target temperature → revisit insulation, ventilation, heater capacity. If it’s too fast or overheats bench level → maybe oversized or ventilation/airflow issues.
6. What Happens in Real Life: Practical Consequences
If you undersize:
- Pre-heat takes long: your users may get frustrated.
- Might not reach your target temperature (so you may feel the sauna never “hits it”).
- Heater may operate at full capacity continuously; potentially more wear and lower lifespan.
- Less efficient: energy use per degree of temperature achieved may be higher.
If you perfectly size:
- You get efficient warm-up (reasonable time) and stable temperature.
- You get even heat, good steam/“löyly” potential, and a great user experience.
- Heater cycles in an optimal way (not too much on/off, but enough to maintain temp).
- Good balance of cost (purchase + electricity) vs performance.
If you oversize (excessively):
- Rapid heat-up may sound good, but bench level might heat too quickly or even be uncomfortably hot.
- Heater may cycle on/off often (short-cycling) which can reduce efficiency and increase wear on elements/controls.
- Wasted cost: bigger heater cost more, wiring may need upgrading, higher purchase & installation cost.
- Energy usage may not scale linearly – you may pay more just to run a larger unit when you don’t need full capacity.
- Possible safety or comfort issues (if design, ventilation, controls are not optimised for the larger heater).
7. Other Important Details & Considerations
- Stone capacity & quality: In traditional saunas, the rocks matter a lot. Bigger/heater-appropriate stone baskets allow more heat storage and better steam when water is poured. If you go cheap on stones, you might not get full benefit of the heater.
- Ventilation & airflow: Even with correct heater size, a sauna with poor airflow (either too little intake or too much heat-loss through vents) will underperform. Make sure you have the proper intake (usually low, near heater) and exhaust (upper opposite wall) for uniform heat.
- Control panel / thermostat / sensor location: The temperature sensor must be placed correctly (often near ceiling but away from direct heating element) to get accurate control. A mis-placed sensor can cut off heater early or overshoot.
- Insulation, door seal & glass/leakage: Ensure your sauna is well sealed; gaps around door, poorly insulated ceiling or wall can cause major heat-loss. Especially with barrel saunas or kit saunas, the joinery, door seal and cladding matter.
- Location & ambient external conditions: Outdoor saunas in winter will have heavier load. Even indoor saunas in cold rooms (e.g., unheated basement) will need extra capacity.
- Usage profile: If the sauna is used frequently, or you want fast pre‐heat times (e.g., you want it hot in 20 minutes), you may decide to size a bit up. Conversely if you use it gently (lower temp, slower warm-up) you might size at baseline.
- Future proofing / changes: If you plan to add more benching area, glass wall, or expand the sauna later, you may consider the next size up now. But that must be weighed carefully.
- Compliance & safety: Make sure your heater installation follows manufacturer specification (clearances to wood, floor, benches), wiring is rated correctly, and ventilation/overheat controls are as required for your region.
- Energy cost vs performance trade‐off: Bigger heater = more capacity = possibly higher electricity draw but maybe shorter run time. But operating cost must be considered. Proper sizing gives best efficiency.
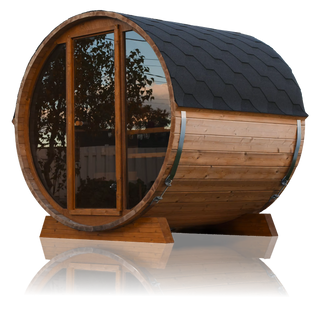
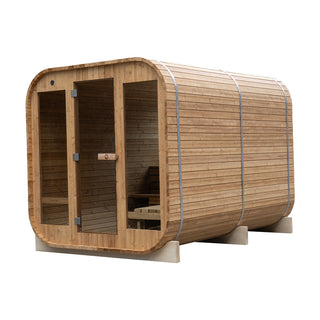
8. Applying this to Outdoor Saunas
- Barrel sauna geometry tends to have lots of curved wood staves, sometimes more exposed surface area; roof, cladding, insulation might vary. So heat-loss might be higher than a well-insulated room-style sauna.
- Outdoor setting means ambient temperature is lower (especially in winter) and wind or poor ground insulation may increase heat-loss. So you might need to oversize slightly (e.g., 10 % extra kW) compared to an indoor specification.
- Roof cladding (e.g., shingles) helps reduce heat loss and improve top temperature.
- Heater clearance, airflow (intake & exhaust) are critical. For barrel saunas the door seal and timber joinery must be tight or you’ll lose heat.
- Stone mass: For barrel saunas you may want good stone capacity so that you get strong “löyly” (steam bursts) and retain heat between sessions.
- Pre-heat times may be longer in colder climates/outdoor barrels; ensure customer expectations are set and heater is sized accordingly.
Key messages
- Always start with volume, then adjust for insulation, materials, location.
- Aim for “just right” rather than “max possible” — the ideal heater size gives you comfortable, stable heat and efficient operation.
- Avoid extremes: undersize = poor performance; grossly oversize = waste, possible comfort issues.
- For outdoor saunas always factor the additional heat-loss / external exposure.
- Stone quality, ventilation, insulation, installation quality matter just as much as the kW number.
- After installation, monitor warm-up time, achievable max temp (bench level), and comfort; if it’s off you may need to revise insulation, airflow or consider heater size change.